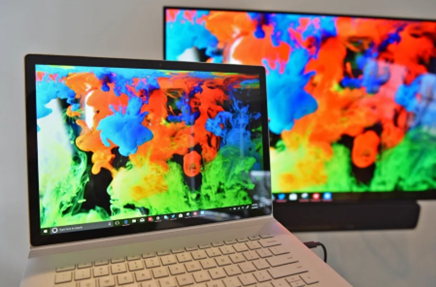
How to Connect a Laptop to a TV Screen for Presentations
Connecting your laptop to a TV screen is a great way to enhance presentations, whether in meeting rooms or at events. A larger display improves visibility, keeps your audience engaged, and ensures your visuals stand out. There are several ways to link your laptop to a TV—HDMI cables offer stable connections, while wireless options provide more flexibility. This guide on How to Connect a Laptop to a TV Screen covers both methods and shares tips to optimize your setup for smooth, professional presentations.
Connect via HDMI for Reliable Presentation Output
A wired HDMI connection is one of the most stable and straightforward ways to project from your laptop to a TV screen. Here’s how to make it work smoothly.
Use a Compatible HDMI Cable and Port
Choose a standard HDMI cable that fits your laptop’s HDMI output port. Many modern laptops include a full-sized HDMI port, while some ultrabooks may need an adapter—such as USB-C to HDMI. Insert one end of the cable into your laptop and the other into the TV’s HDMI input. Turn on both devices. Using the TV remote, select the correct HDMI input source. A good-quality HDMI cable ensures seamless video and audio transmission without delays or signal loss.
Set the TV to Extended or Duplicated Display
After connecting the HDMI cable, configure your display mode. On Windows, press Windows + P; on macOS, go to System Settings > Displays. You can choose to duplicate the display (mirror your screen) or extend it (treat the TV as a second screen). Duplicating is best for traditional presentations, while extending is useful if you want speaker notes visible only to you. Confirm the arrangement and adjust your laptop display settings so the content shows properly on the TV.
Adjust Resolution for Best Slide Clarity
Make sure the resolution settings match your TV’s native resolution—typically 1920x1080 for Full HD TVs. Go to Display Settings on your laptop and select the external display. Choose the highest resolution that the TV supports without scaling issues. Clear resolution is critical for displaying text, graphs, and visuals accurately. If the text looks blurry or oversized, try adjusting the scaling percentage or selecting “Recommended” resolution to ensure maximum clarity for your slides during presentations.
Use Wireless Methods in Meeting Rooms
Wireless options let you move freely and avoid cable clutter. Most modern TVs and laptops support casting features that simplify connections.
Enable Wireless Display on TV and Laptop
Ensure your smart TV’s wireless display or screen mirroring feature is turned on. On most TVs, navigate to the display settings and activate this option. On your laptop, access the display menu—Windows users can press Windows + K, while macOS users use AirPlay from the menu bar. Select the TV from the list of available devices. Both your laptop and TV must be on the same Wi-Fi network for the connection to work smoothly.
Connect via Casting Tools Like Miracast or AirPlay
Miracast works natively on many Windows laptops, while AirPlay is built into macOS and iOS devices. For Miracast, open the “Connect” panel (Windows + K), then choose your TV. For AirPlay, click the AirPlay icon and select the compatible TV. These tools support full-screen mirroring and audio output, ideal for presentations. If your TV doesn’t support these features, consider using a streaming device like Chromecast or Apple TV to enable wireless casting functionality.
Ensure Stable Wi-Fi to Avoid Presentation Lag
A fast and stable Wi-Fi connection is essential for smooth wireless projection. Lag or dropouts can disrupt your presentation and frustrate your audience. Use a 5GHz Wi-Fi network whenever possible to minimize interference and increase speed. Ensure that both your laptop and TV have a strong signal strength. If available, prioritize your laptop on the network. Running a quick speed test before your session helps confirm that the network can support streaming high-resolution slides and video smoothly.
Optimize Presentation Settings on Your Laptop
Optimizing your laptop’s settings ensures your presentation runs smoothly and looks professional on the big screen.
Set Presentation Mode in Display Settings
Use your operating system’s presentation mode to block pop-ups and optimize performance. On Windows, activate “Presentation Mode” via the Mobility Center to disable sleep and prevent notifications. Mac users can use “Do Not Disturb” and enable full-screen slide mode in PowerPoint or Keynote. Presentation modes adjust display settings and help your device stay awake, ensuring your slideshow runs without interruptions or blackouts during extended sessions on the external screen.

Disable Notifications and Background Apps
Before you begin, disable unnecessary apps and background processes to avoid distractions. Turn off system notifications in your laptop’s settings—on Windows, open Focus Assist; on macOS, use Do Not Disturb. Close messaging apps, email clients, or system updates that could pop up mid-presentation. Freeing up system resources also improves performance and reduces the risk of lag. A clean desktop and focused setup ensure your audience pays attention to your content, not background distractions.
Test Slide Visibility and Audio on TV
Once connected, test your presentation by running a few sample slides. Check text readability, image sharpness, and transitions on the TV screen. If your presentation includes sound, play a short clip to ensure the audio output works through the TV’s speakers. Adjust font sizes and slide contrast if visuals appear too dim or small. This pre-check ensures everything looks and sounds professional, giving you confidence before stepping into your actual presentation.
Fix Connection or Display Issues Quickly
Technical issues can disrupt your flow. Here’s how to troubleshoot fast and keep things running.
Switch to Backup Cables or Adapters
Always carry a backup HDMI cable or adapter in case your main connection fails. Cables can wear out or break, especially at the ends. If using an adapter (e.g., USB-C to HDMI), test it ahead of time and keep a spare. A secondary cable helps quickly resolve hardware issues without requiring Wi-Fi setup. Also, check for dust in ports or loose connections. Swapping hardware often fixes display issues faster than software troubleshooting.
Reboot Devices or Reconnect Wireless Tools
If wireless projection suddenly stops working, try rebooting both your laptop and TV. This can reset their communication settings and restore the connection. Reopen your casting tool (e.g., AirPlay, Miracast) and reselect the TV. If the screen is frozen or black, disconnect and reconnect the wireless session. A simple restart often clears cache conflicts and software bugs that cause display issues. Quick reboots are effective for regaining control during time-sensitive presentations.
Use a Portable Dongle or Presentation Stick
Presentation dongles like Chromecast, Microsoft Wireless Display Adapter, or dedicated presentation sticks can offer a backup wireless method. These devices plug into the TV’s HDMI port and create their own casting environment. You control your presentation from your laptop or even a phone. They’re especially useful in conference rooms without smart TVs. Pair the dongle in advance and test compatibility with your device. Reliable and compact, they’re ideal for presenters on the move.
Conclusion
Presenting on a larger TV screen boosts visual clarity and audience engagement. Whether using HDMI for dependability or wireless methods for mobility, the right setup ensures smooth delivery. Preparing your display settings, disabling distractions, and testing your setup ahead of time reduces technical surprises. Carry backup cables and consider wireless dongles as reliable alternatives. A professional presentation setup reflects your readiness and attention to detail. By following these tips, you can confidently deliver impactful, polished presentations using any modern TV screen as your display solution.
FAQ
1. What’s the best resolution for TV-based presentations?
The ideal resolution is 1920x1080 (Full HD), which most TVs support. This ensures crisp text and clear visuals. Higher resolutions like 4K are fine if supported by your laptop and TV, but not always necessary for presentations. Always match your laptop’s output to the TV’s native resolution for best results.
2. Can I control my slides remotely while connected to the TV?
Yes, you can use wireless remotes, presentation clickers, or apps like PowerPoint Remote or Keynote Remote. These tools let you navigate slides without touching your laptop, offering freedom to move around while presenting.
3. Is wireless projection reliable for business use?
Wireless projection is reliable when you have a strong, stable Wi-Fi connection and compatible devices. Tools like AirPlay and Miracast work well in modern meeting rooms. However, for critical presentations, it’s wise to carry an HDMI cable or dongle as a backup in case wireless issues arise.
- Prev
- Next


